02
National Park of American Samoa American Samoa
The Icon: Pola Island from Vatia Where: Vatia / Pola Island viewpoint area Best Light: Morning Lens: 24 - 70mm Access: Roadside + short walk ✨ Why It Works: Steep green volcanic ridges dropping into the South Pacific immediately say American Samoa. Photo Tip: Use foreground vegetation to frame the offshore rock. The Experience: Mount Alava Ridge View Where: Mount Alava Trail Best Light: Morning Lens: 24 - 70mm Access: Strenuous hike ✨ Why It Works: The high ridge reveals Pago Pago Harbor and lush island topography. Photo Tip: Humidity is intense; carry water and protect gear from sudden rain. ✨ The Wild Card: Ofu Beach Lagoon Where: Ofu Island coastline Best Light: Late morning for water color Lens: Wide-angle / action camera Access: Remote access ✨ Why It Works: Coral lagoon, white sand and volcanic peaks create one of the system's most tropical images. Photo Tip: A polarizer can deepen water color, but avoid over-darkening the sky.
03
Arches National Park Utah
The Icon: Delicate Arch at Sunset Where: Delicate Arch viewpoint at the end of the trail Best Light: Golden hour / sunset Lens: 24 - 70mm Access: Moderate hike ✨ Why It Works: The freestanding arch glowing against distant mesas is Utah's postcard. Photo Tip: Stay through afterglow instead of leaving the instant the sun drops. The Experience: The Windows at Sunrise Where: Windows Section Best Light: Sunrise Lens: 16 - 35mm Access: Short walks ✨ Why It Works: North Window, South Window and Turret Arch let you work close to the stone. Photo Tip: Use people sparingly to communicate scale. ✨ The Wild Card: Milky Way at Double Arch Where: Double Arch / Windows area Best Light: Moonless night Lens: 14 - 24mm Access: Short walk ✨ Why It Works: The arches become giant natural frames for the night sky. Photo Tip: Scout the composition in daylight and use a tripod.
04
Badlands National Park South Dakota
The Icon: Pinnacles Overlook Sunrise Where: Pinnacles Overlook Best Light: Sunrise Lens: 24 - 70mm Access: Roadside ✨ Why It Works: Low-angle light reveals the striped textures of the badlands. Photo Tip: Expose for highlights and let shadows keep the formations sculptural. The Experience: Notch Trail Ladder Where: Notch Trail Best Light: Morning Lens: 16 - 35mm Access: Moderate hike ✨ Why It Works: The ladder and cliff route make the landscape feel adventurous rather than distant. Photo Tip: Photograph a hiker on the ladder for scale and story. ✨ The Wild Card: Bison in Sage Creek Where: Sage Creek Rim Road area Best Light: Dawn / dusk Lens: Telephoto Access: Roadside wildlife viewing ✨ Why It Works: Bison against prairie and eroded formations gives the park a living dimension. Photo Tip: Stay in your vehicle or maintain required wildlife distance.
05
Big Bend National Park Texas
The Icon: Santa Elena Canyon Where: Santa Elena Canyon trail / river edge Best Light: Morning or late afternoon Lens: 16 - 35mm Access: Easy - moderate walk ✨ Why It Works: The Rio Grande slices between enormous limestone walls. Photo Tip: Use the river as a leading line into the canyon. The Experience: Lost Mine Trail View Where: Lost Mine Trail Best Light: Morning Lens: 24 - 70mm Access: Moderate hike ✨ Why It Works: Layered Chisos peaks show Big Bend is more than desert flats. Photo Tip: Start early for cooler temperatures and cleaner light. ✨ The Wild Card: The Window at Sunset Where: Chisos Basin Window View / trail area Best Light: Sunset Lens: 35 - 85mm Access: Easy ✨ Why It Works: The natural V-shaped opening funnels the sunset into a perfect frame. Photo Tip: Underexpose slightly to preserve sky color.
06
Biscayne National Park Florida
The Icon: Boca Chita Lighthouse Where: Boca Chita Key Best Light: Late afternoon Lens: 24 - 70mm Access: Boat access ✨ Why It Works: The small lighthouse, palms and turquoise bay instantly communicate Biscayne. Photo Tip: Include dock or shoreline as foreground for depth. The Experience: Coral Reef Snorkel Where: Guided reef trip Best Light: Late morning Lens: Underwater wide-angle / action camera Access: Boat + snorkel ✨ Why It Works: Fish, coral and clear water reveal the park's true underwater identity. Photo Tip: Get close, shoot level with marine life, and avoid touching coral. ✨ The Wild Card: Maritime Heritage Wreck Where: Maritime Heritage Trail Best Light: Midday underwater Lens: Wide-angle underwater Access: Boat + snorkel/dive ✨ Why It Works: Shipwreck structure adds history and mystery beneath the water. Photo Tip: Use ambient light and keep bubbles/people in frame for scale.
07
Black Canyon of the Gunnison National Park Colorado
The Icon: Painted Wall Where: Painted Wall View on South Rim Road Best Light: Late afternoon Lens: 24 - 70mm Access: Roadside + short walk ✨ Why It Works: The light-colored pegmatite streaks make the canyon wall instantly recognizable. Photo Tip: Include a sliver of rim vegetation to show scale. The Experience: Chasm View Where: Chasm View overlook Best Light: Morning / late afternoon Lens: 16 - 35mm Access: Short walk ✨ Why It Works: The narrow gorge emphasizes the canyon's extreme depth and steepness. Photo Tip: Avoid flattening the scene; use foreground rock to create layers. ✨ The Wild Card: Milky Way Over the Rim Where: South Rim dark-sky viewpoints Best Light: Night Lens: 14 - 24mm Access: Roadside / short walk ✨ Why It Works: Dark skies above an already black canyon create a dramatic night composition. Photo Tip: Scout safely before dark and keep well back from edges.
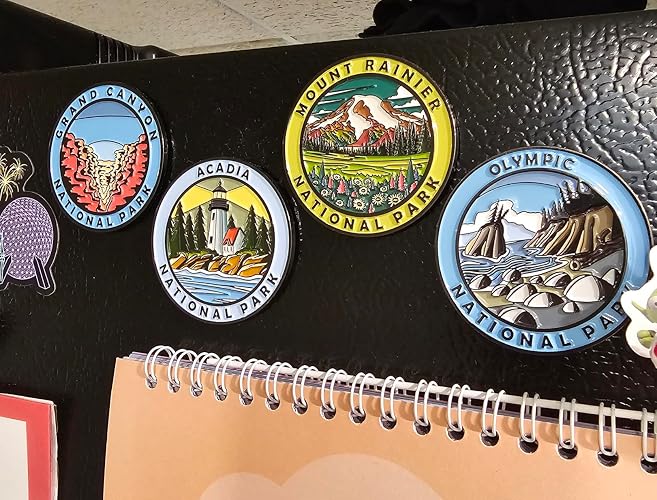
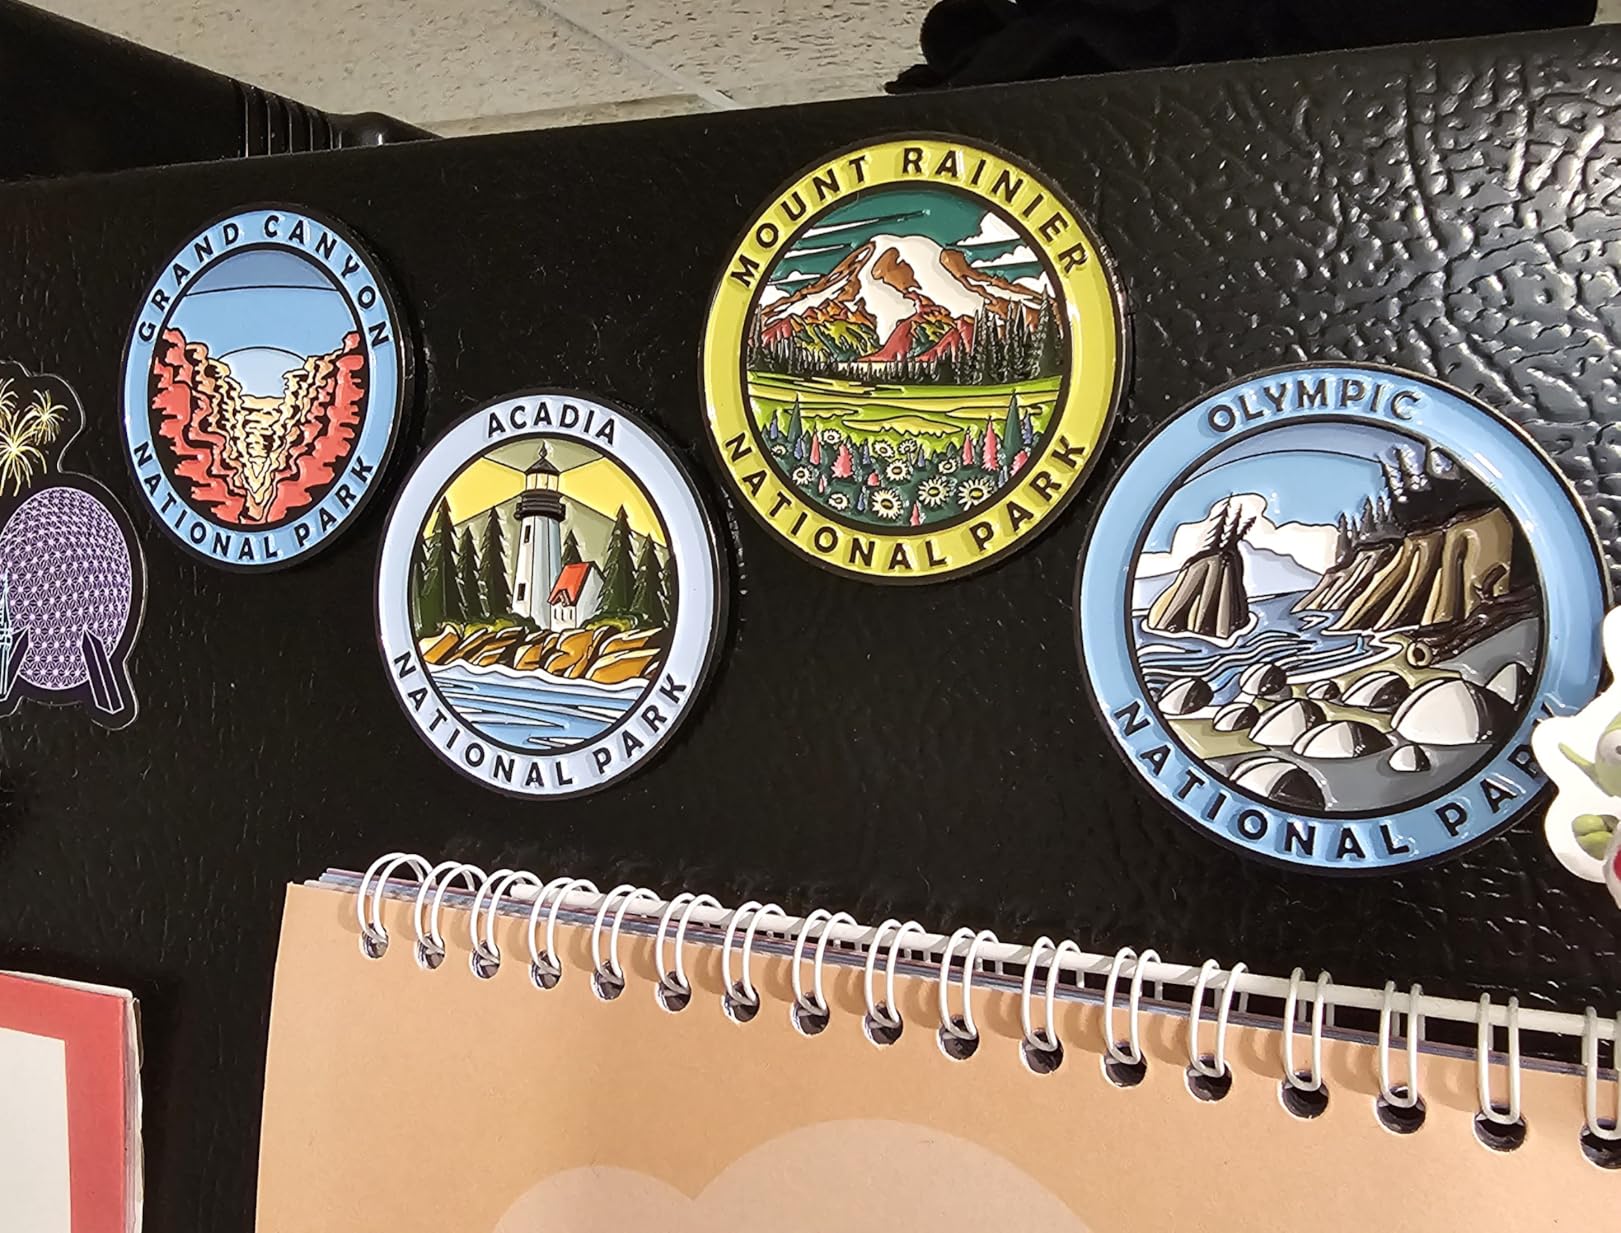
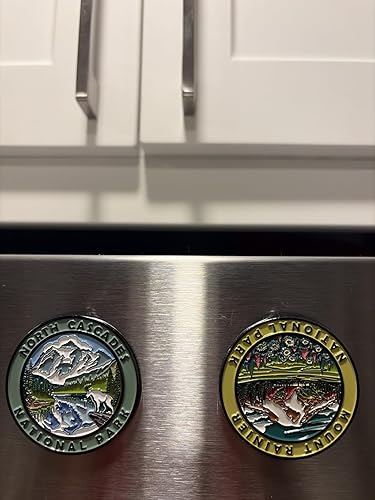
Keep this guide open while comparing routes, seasons, and the small park markers that help each stop stay distinct.
08
Bryce Canyon National Park Utah
The Icon: Bryce Amphitheater Sunrise Where: Sunrise Point / Inspiration Point Best Light: Sunrise Lens: 24 - 70mm Access: Easy ✨ Why It Works: First light makes thousands of hoodoos glow orange and pink. Photo Tip: Side light creates more depth than a colorful sky alone. The Experience: Inside Navajo Loop Where: Navajo Loop / Queen's Garden Best Light: Morning Lens: 16 - 35mm Access: Moderate hike ✨ Why It Works: Walking between hoodoos makes their scale and texture much more powerful. Photo Tip: Use a hiker as a small figure within the stone forest. ✨ The Wild Card: Thor's Hammer Where: Navajo Loop area Best Light: Morning / late afternoon Lens: 70 - 200mm Access: Moderate hike ✨ Why It Works: The isolated hoodoo gives the landscape a memorable character. Photo Tip: A longer lens separates it cleanly from background clutter.
09
Canyonlands National Park Utah
The Icon: Mesa Arch at Dawn Where: Mesa Arch, Island in the Sky Best Light: Sunrise Lens: 16 - 35mm Access: Short walk ✨ Why It Works: Sunlight can ignite the underside of the arch above canyon country. Photo Tip: Arrive well before sunrise because the small shooting area fills quickly. The Experience: Grand View Point Where: Grand View Point Trail Best Light: Late afternoon Lens: 24 - 70mm Access: Easy - moderate walk ✨ Why It Works: The trail reveals layers of mesas and canyons stretching to the horizon. Photo Tip: Include a person or rim edge so the vast scale reads in a photo. ✨ The Wild Card: Chesler Park Needles Where: The Needles district Best Light: Golden hour Lens: 16 - 35mm Access: Long hike ✨ Why It Works: Sandstone spires and grasslands show a completely different Canyonlands. Photo Tip: Treat this as a full hiking-photo mission, not a quick pullout.
10
Capitol Reef National Park Utah
The Icon: Fruita Orchards + Red Cliffs Where: Fruita Historic District Best Light: Morning / late afternoon Lens: 24 - 70mm Access: Roadside + easy walks ✨ Why It Works: Green orchards beneath red cliffs create a look unlike Utah's other parks. Photo Tip: Use fences, barns or fruit trees as foreground. The Experience: Cassidy Arch Where: Cassidy Arch Trail Best Light: Morning Lens: 16 - 35mm Access: Moderate - strenuous hike ✨ Why It Works: Standing near the arch places you inside Capitol Reef's folded sandstone terrain. Photo Tip: Shoot from a safe angle that shows both arch and canyon below. ✨ The Wild Card: Temple of the Sun Where: Cathedral Valley Best Light: Sunrise / sunset Lens: 24 - 70mm Access: Remote high-clearance route ✨ Why It Works: Monoliths rising from open desert feel cinematic and isolated. Photo Tip: Only attempt with appropriate vehicle, weather and route preparation.
11
Carlsbad Caverns National Park New Mexico
The Icon: Big Room Formations Where: Big Room Best Light: Any open hours Lens: Wide-angle fast lens Access: Paved cave route ✨ Why It Works: Enormous chambers and formations communicate the cave's scale. Photo Tip: Stabilize carefully and avoid flash-heavy, flat lighting. The Experience: Natural Entrance Descent Where: Natural Entrance Trail Best Light: Midday exterior / cave ambient Lens: 16 - 35mm Access: Steep paved descent ✨ Why It Works: The transition from desert daylight into darkness tells the park's story. Photo Tip: Photograph the entrance with people for scale before descending. ✨ The Wild Card: Chihuahuan Desert Sunset Where: Walnut Canyon Desert Drive / surface viewpoints Best Light: Sunset Lens: 24 - 70mm Access: Roadside ✨ Why It Works: The surface desert is an overlooked contrast to the world underground. Photo Tip: Use yucca or desert plants as silhouette foreground.
12
Channel Islands National Park California
The Icon: Inspiration Point Where: Anacapa Island Inspiration Point Best Light: Morning / afternoon Lens: 16 - 35mm Access: Boat + moderate walk ✨ Why It Works: A chain of rugged islets stretching into blue Pacific water defines the park. Photo Tip: Use the curving island chain as a natural leading line. The Experience: Sea Cave Kayaking Where: Santa Cruz Island / Scorpion area Best Light: Morning Lens: Action camera / wide-angle Access: Boat + guided kayak ✨ Why It Works: Paddlers under sea cliffs make the marine landscape feel immersive. Photo Tip: Protect gear from spray and include kayak bow for point-of-view storytelling. ✨ The Wild Card: Island Fox Portrait Where: Santa Cruz Island Best Light: Morning / late afternoon Lens: Telephoto Access: Easy around developed areas ✨ Why It Works: The tiny endemic fox is one of the park's most distinctive subjects. Photo Tip: Never lure or crowd wildlife; photograph natural behavior.
13
Congaree National Park South Carolina
The Icon: Boardwalk Through Old-Growth Forest Where: Boardwalk Loop Best Light: Morning Lens: 24 - 70mm Access: Easy boardwalk ✨ Why It Works: Elevated walkway disappearing into giant trees gives immediate depth. Photo Tip: Use the boardwalk as a strong leading line. The Experience: Cedar Creek Paddle Where: Cedar Creek Canoe Trail Best Light: Morning Lens: Wide-angle / phone Access: Canoe or kayak ✨ Why It Works: Reflections, cypress knees and blackwater create a quiet immersive scene. Photo Tip: Keep the camera low to the water for stronger reflections. ✨ The Wild Card: Bald Cypress Reflections Where: Weston Lake / floodplain Best Light: Still morning Lens: 35 - 85mm Access: Easy - moderate walk ✨ Why It Works: Calm water can turn trunks and knees into graphic patterns. Photo Tip: A polarizer can help control glare, but don't remove all reflection.
Keep this guide open while comparing routes, seasons, and the small park markers that help each stop stay distinct.
14
Crater Lake National Park Oregon
The Icon: Wizard Island from the Rim Where: Watchman / Discovery Point area Best Light: Morning Lens: 24 - 70mm Access: Roadside + short walk ✨ Why It Works: The island floating in impossibly blue water is Crater Lake's defining view. Photo Tip: Avoid midday haze when possible and preserve highlight detail in snow. The Experience: Rim Drive Viewpoints Where: Multiple rim overlooks Best Light: Morning / late afternoon Lens: 24 - 70mm Access: Roadside ✨ Why It Works: Changing angles reveal the caldera's scale and cliff geometry. Photo Tip: Stop at several overlooks rather than chasing one 'best' view. ✨ The Wild Card: Stars Over the Caldera Where: Open rim viewpoints Best Light: Night Lens: 14 - 24mm Access: Roadside / short walk ✨ Why It Works: Dark skies and the circular lake make a striking celestial composition. Photo Tip: Check moon phase and cold-weather conditions even in summer.
15
Cuyahoga Valley National Park Ohio
The Icon: Brandywine Falls Where: Brandywine Falls boardwalk viewpoints Best Light: Overcast / early morning Lens: 24 - 70mm Access: Easy boardwalk ✨ Why It Works: Layered water over sandstone is the park's most recognizable scene. Photo Tip: Overcast light helps keep waterfall highlights controlled. The Experience: The Ledges Where: Ledges Trail Best Light: Late afternoon Lens: 16 - 35mm Access: Easy - moderate hike ✨ Why It Works: Mossy rock passages reveal a more intimate side of the park. Photo Tip: Use hikers to show the narrow scale of sandstone corridors. ✨ The Wild Card: Everett Covered Bridge in Fall Where: Everett Road Covered Bridge Best Light: Late afternoon Lens: 35 - 85mm Access: Easy ✨ Why It Works: Historic architecture surrounded by autumn color adds story and season. Photo Tip: Frame the bridge through foliage rather than centering it mechanically.
16
Death Valley National Park California & Nevada
The Icon: Zabriskie Point Sunrise Where: Zabriskie Point Best Light: Sunrise Lens: 24 - 70mm Access: Roadside + short walk ✨ Why It Works: Raking light transforms eroded badlands into waves of gold and shadow. Photo Tip: Arrive before dawn and stay after sunrise as color keeps changing. The Experience: Mesquite Flat Sand Dunes Where: Stovepipe Wells dunes Best Light: Sunrise / sunset Lens: 24 - 70mm Access: Moderate sand walk ✨ Why It Works: Curves, footprints and shadow patterns capture the desert's abstract side. Photo Tip: Walk away from the busiest entry line for cleaner dune ridges. ✨ The Wild Card: Artists Palette Where: Artists Drive / Artists Palette Best Light: Late afternoon Lens: 70 - 200mm Access: Roadside ✨ Why It Works: Mineral colors turn the hills into natural color fields. Photo Tip: Use a longer lens to isolate color layers rather than showing everything.
17
Denali National Park Alaska
The Icon: Denali Above the Tundra Where: Accessible Park Road viewpoints when the mountain is visible Best Light: Morning / clear weather Lens: 70 - 200mm Access: Transit/roadside ✨ Why It Works: North America's highest peak rising above tundra is the classic Denali image. Photo Tip: Clouds are common, so treat clear mountain views as a bonus, not a guarantee. The Experience: Wildlife Along the Park Road Where: Park Road wildlife-viewing corridor Best Light: Dawn / morning Lens: Telephoto Access: Bus/transit wildlife viewing ✨ Why It Works: Caribou, moose, bears and Dall sheep make the road feel like a safari. Photo Tip: Keep the lens ready and photograph animals within the larger landscape. ✨ The Wild Card: Savage River Landscape Where: Savage River area Best Light: Golden hour Lens: 24 - 70mm Access: Easy - moderate hike ✨ Why It Works: Braided river, tundra and mountains show Denali beyond the single peak. Photo Tip: Use the river as a leading line toward distant ridges.
18
Dry Tortugas National Park Florida
The Icon: Fort Jefferson from Above Where: Seaplane approach / aerial view Best Light: Late morning Lens: 24 - 70mm Access: Seaplane ✨ Why It Works: The geometric brick fort surrounded by turquoise water is unforgettable. Photo Tip: Shoot through a clean window and use fast shutter speed. The Experience: Moat Wall + Fort Where: Moat walk around Fort Jefferson Best Light: Morning / afternoon Lens: 16 - 35mm Access: Easy walk ✨ Why It Works: Brick walls against blue sea deliver strong color and geometry. Photo Tip: Use the wall as a leading line toward the fort. ✨ The Wild Card: Snorkeling the Fort Pilings Where: Garden Key snorkel areas Best Light: Midday Lens: Underwater wide-angle Access: Easy snorkel ✨ Why It Works: Fish and historic structures combine marine life with human history. Photo Tip: Stay shallow, use ambient light and keep the fort structure visible.
19
Everglades National Park Florida
The Icon: Alligator on Anhinga Trail Where: Anhinga Trail Best Light: Morning Lens: 70 - 200mm Access: Easy boardwalk ✨ Why It Works: Wild alligators beside a boardwalk create an immediate Everglades story. The Experience: Shark Valley Wetland View Where: Shark Valley loop / observation area Best Light: Morning / late afternoon Lens: 24 - 70mm + telephoto Access: Bike/tram/roadside ✨ Why It Works: Open sawgrass, birds and reptiles show the scale of the River of Grass. Photo Tip: Alternate wide habitat shots with tighter wildlife frames. ✨ The Wild Card: Flamingo Mangrove Sunset Where: Flamingo area Best Light: Sunset Lens: 24 - 70mm Access: Easy ✨ Why It Works: Mangrove silhouettes and pastel skies show a quieter coastal Everglades. Photo Tip: Watch for birds crossing the sky to add life to the frame.
Keep this guide open while comparing routes, seasons, and the small park markers that help each stop stay distinct.
20
Gates of the Arctic National Park Alaska
The Icon: Brooks Range from the Air Where: Bush-plane approach Best Light: Morning / clear weather Lens: 24 - 70mm Access: Flight access ✨ Why It Works: Roadless mountain wilderness stretching to the horizon defines the park. Photo Tip: Use a fast shutter and photograph through the cleanest part of the window. The Experience: Wild River Camp Where: Backcountry river corridor such as the Alatna or Noatak Best Light: Golden hour Lens: 24 - 70mm Access: Expedition ✨ Why It Works: A tent, river and mountains tell the true wilderness story. Photo Tip: Include a human-scale element without cluttering the landscape. ✨ The Wild Card: Arrigetch Peaks Where: Arrigetch Peaks backcountry Best Light: Morning / evening Lens: 16 - 35mm Access: Expedition hike ✨ Why It Works: Sharp granite spires create one of Alaska's most dramatic remote compositions.
21
Gateway Arch National Park Missouri
The Icon: Gateway Arch + Reflecting Pool Where: Arch grounds / reflecting pool area Best Light: Blue hour / evening Lens: 16 - 35mm Access: Easy ✨ Why It Works: Symmetry and reflections emphasize the monument's clean geometry. Photo Tip: Centering can work here because the architecture is strongly symmetrical. The Experience: Under the Arch Looking Up Where: Base of Gateway Arch Best Light: Morning / blue sky Lens: Ultra-wide Access: Easy ✨ Why It Works: The curve feels enormous when photographed from directly below. Photo Tip: Tilt creatively and let converging lines exaggerate height. ✨ The Wild Card: Arch + Old Courthouse Where: Kiener Plaza / downtown viewpoints Best Light: Golden hour Lens: 35 - 85mm Access: Easy city walk ✨ Why It Works: Historic architecture in the foreground adds St. Louis context. Photo Tip: Use a longer lens to align courthouse and Arch cleanly.
22
Glacier Bay National Park Alaska
The Icon: Tidewater Glacier Face Where: Day boat / cruise ship near an active tidewater glacier Best Light: Overcast / bright morning Lens: 70 - 200mm Access: Boat ✨ Why It Works: Blue ice meeting dark water is the park's defining scene. Photo Tip: Leave room around the glacier to show scale and wait for calving only from safe distance. The Experience: Humpback Whale in the Bay Where: Glacier Bay marine waters Best Light: Morning / whenever encountered Lens: 100 - 500mm Access: Boat ✨ Why It Works: Whales against mountain water make Glacier Bay feel alive. Photo Tip: Use fast shutter speed and anticipate where the whale may surface. ✨ The Wild Card: Bartlett Cove Sunset Where: Bartlett Cove shoreline Best Light: Evening Lens: 24 - 70mm Access: Easy ✨ Why It Works: Quiet water and distant mountains offer a calm counterpoint to glacier drama. Photo Tip: Use driftwood or shoreline rocks as foreground.
23
Glacier National Park Montana
The Icon: Wild Goose Island Where: Wild Goose Island Overlook, St. Mary Lake Best Light: Sunrise / early morning Lens: 24 - 70mm Access: Roadside ✨ Why It Works: Tiny island, huge lake and serrated peaks create Glacier's classic composition. Photo Tip: Morning light often gives the mountains the strongest dimensionality. The Experience: Highline Trail Where: Highline Trail near Logan Pass Best Light: Morning Lens: 16 - 35mm Access: Moderate - strenuous hike ✨ Why It Works: A narrow alpine trail beneath huge peaks captures the hiking experience. Photo Tip: Include a hiker on the trail to communicate exposure and scale. ✨ The Wild Card: Mountain Goat at Logan Pass Where: Logan Pass area Best Light: Morning / late afternoon Lens: Telephoto Access: Easy - moderate ✨ Why It Works: White goats against alpine rock are quintessential Glacier wildlife. Photo Tip: Give wildlife space and never approach for a cleaner background.
24
Grand Canyon National Park Arizona
The Icon: Canyon at Sunrise Where: Yavapai Point / Mather Point area Best Light: Sunrise Lens: 24 - 70mm Access: Easy ✨ Why It Works: Layer after layer of canyon depth unfolds as first light reaches the walls. Photo Tip: Use a medium focal length to simplify the enormous scene. The Experience: South Kaibab Trail Where: Ooh Aah Point / Cedar Ridge area Best Light: Morning Lens: 16 - 35mm Access: Moderate - strenuous hike ✨ Why It Works: Being below the rim finally reveals the canyon's true vertical scale. Photo Tip: Turn around often; the best frame may be behind you on the climb. ✨ The Wild Card: Desert View Watchtower Where: Desert View Best Light: Late afternoon Lens: 24 - 70mm Access: Easy ✨ Why It Works: The stone tower and Colorado River add human history and depth. Photo Tip: Position the tower off-center and let the canyon carry the frame.
25
Grand Teton National Park Wyoming
The Icon: Schwabacher Landing Reflection Where: Schwabacher Landing Best Light: Sunrise Lens: 24 - 70mm Access: Short walk ✨ Why It Works: Still water can mirror the Tetons almost perfectly. Photo Tip: Arrive before sunrise, not at sunrise. The Experience: Mormon Row Barn Where: Mormon Row Best Light: Sunrise / early morning Lens: 70 - 200mm Access: Easy ✨ Why It Works: Historic barns give the mountains scale and a human story. Photo Tip: Longer focal lengths visually pull the Tetons closer to the barn. ✨ The Wild Card: Oxbow Bend Wildlife Where: Oxbow Bend Best Light: Dawn Lens: Telephoto Access: Roadside ✨ Why It Works: Moose, birds or other wildlife can appear beneath Mount Moran. Photo Tip: Scan shorelines before focusing only on the mountain reflection.
Keep this guide open while comparing routes, seasons, and the small park markers that help each stop stay distinct.
26
Great Basin National Park Nevada
The Icon: Wheeler Peak + Bristlecones Where: Bristlecone Pine Trail area Best Light: Morning / late afternoon Lens: 24 - 70mm Access: Moderate hike ✨ Why It Works: Ancient twisted trees beneath a high alpine peak summarize Great Basin. Photo Tip: Use a low angle to silhouette branches against the mountain. The Experience: Ancient Bristlecone Portrait Where: Bristlecone grove Best Light: Soft morning / overcast Lens: 35 - 85mm Access: Moderate hike ✨ Why It Works: Gnarled wood textures convey age better than a wide scenic alone. Photo Tip: Look for curves and details rather than only photographing whole trees. ✨ The Wild Card: Milky Way Over Wheeler Peak Where: Wheeler Peak Scenic Drive viewpoints / campground areas Best Light: Moonless night Lens: 14 - 24mm Access: Roadside / short walk ✨ Why It Works: Great Basin's dark skies are one of its signature experiences. Photo Tip: Scout foregrounds before dark and bring warm layers.
27
Great Sand Dunes National Park and Preserve Colorado
The Icon: Dunes + Sangre de Cristo Mountains Where: Main dune field Best Light: Sunset Lens: 24 - 70mm Access: Moderate sand walk ✨ Why It Works: Golden dunes beneath snowy or green mountains create a surreal contrast. Photo Tip: Use a person on a ridge to reveal scale. The Experience: Dune Ridge Hiker Where: High Dune / dune field ridges Best Light: Late afternoon Lens: 70 - 200mm Access: Strenuous sand hike ✨ Why It Works: Compressed layers of ridges and a tiny hiker create graphic patterns. Photo Tip: A longer lens makes the dunes feel steeper and more abstract. ✨ The Wild Card: Medano Creek Reflection Where: Medano Creek when flowing Best Light: Morning / evening Lens: 24 - 70mm Access: Easy ✨ Why It Works: Seasonal water reflects dunes and mountains, adding a rare blue foreground. Photo Tip: Flow varies greatly by season and year, so treat it as a bonus shot.
28
Great Smoky Mountains National Park Tennessee & North Carolina
The Icon: Blue Ridge Layers Where: Kuwohi / Newfound Gap area Best Light: Sunrise Lens: 70 - 200mm Access: Roadside + short walk ✨ Why It Works: Mist-filled mountain layers create the classic Smokies look. Photo Tip: Use a longer lens to compress ridge after ridge. The Experience: Cades Cove Wildlife Where: Cades Cove Best Light: Dawn Lens: Telephoto Access: Scenic drive / bike ✨ Why It Works: Deer, bears, mist and historic fields combine nature and culture. Photo Tip: Go early and photograph animals with the landscape, not just tight portraits. ✨ The Wild Card: Waterfall in Fall Color Where: Laurel Falls / other accessible waterfall trail Best Light: Overcast / morning Lens: 24 - 70mm Access: Easy - moderate hike ✨ Why It Works: Water and autumn foliage bring motion and color together. Photo Tip: A slower shutter works best with a tripod where permitted and practical.
29
Guadalupe Mountains National Park Texas
The Icon: El Capitan from the Desert Where: US 62/180 pullout / park approach Best Light: Late afternoon Lens: 70 - 200mm Access: Roadside ✨ Why It Works: The massive limestone face rises dramatically from Chihuahuan Desert. Photo Tip: Use desert plants in the foreground to show environment. The Experience: Guadalupe Peak Summit Where: Guadalupe Peak Trail Best Light: Morning / midday clear weather Lens: 24 - 70mm Access: Strenuous hike ✨ Why It Works: The summit view proves why this is a hikers' park. Photo Tip: Include the summit marker and surrounding desert for context. ✨ The Wild Card: McKittrick Canyon Fall Color Where: McKittrick Canyon Best Light: Late October - November Lens: 24 - 70mm Access: Moderate hike ✨ Why It Works: Autumn maples create an unexpected burst of color in west Texas. Photo Tip: Time is everything; foliage windows are short and variable.
30
Haleakalā National Park Hawaii
The Icon: Haleakalā Summit Sunrise Where: Summit area Best Light: Sunrise Lens: 24 - 70mm Access: Roadside + short walk ✨ Why It Works: Clouds below a volcanic summit create one of Hawaii's most famous dawn scenes. Photo Tip: Plan required sunrise access well ahead and bring warm layers. The Experience: Sliding Sands Crater Trail Where: Keoneheʻeheʻe / Sliding Sands Trail Best Light: Morning Lens: 16 - 35mm Access: Strenuous hike ✨ Why It Works: Colorful cinder cones and huge crater space feel otherworldly. Photo Tip: Turn around for compositions that include the crater rim behind you. ✨ The Wild Card: Kīpahulu Coast Where: Kīpahulu District overlooks Best Light: Late afternoon Lens: 24 - 70mm Access: Roadside + easy walks ✨ Why It Works: Rainforest and lava coastline show Haleakalā's tropical side. Photo Tip: Don't let the summit define the whole park; shoot both districts.
31
Hawaiʻi Volcanoes National Park Hawaii
The Icon: Kīlauea Caldera Where: Kīlauea overlook areas Best Light: Morning / evening Lens: 24 - 70mm Access: Easy ✨ Why It Works: Steam, crater walls and volcanic scale define the park even when no eruption is visible. Photo Tip: Check current viewing areas because volcanic conditions change. The Experience: Kīlauea Iki Trail Where: Kīlauea Iki crater Best Light: Morning Lens: 16 - 35mm Access: Moderate hike ✨ Why It Works: Walking across a solidified lava lake makes geology feel immediate. Photo Tip: Photograph hikers as tiny figures to show crater scale. ✨ The Wild Card: Nāhuku Lava Tube Where: Nāhuku area Best Light: Daytime Lens: Wide-angle fast lens Access: Easy - moderate walk ✨ Why It Works: The enclosed lava tube gives a completely different volcanic texture. Photo Tip: Protect highlights near entrances and expose for darker interior details.
Keep this guide open while comparing routes, seasons, and the small park markers that help each stop stay distinct.
32
Hot Springs National Park Arkansas
The Icon: Bathhouse Row Where: Central Avenue / Bathhouse Row Best Light: Morning / blue hour Lens: 24 - 70mm Access: Easy city walk ✨ Why It Works: Historic bathhouse architecture is the park's defining visual identity. Photo Tip: Shoot from an angle that shows repetition of facades. The Experience: Grand Promenade Where: Grand Promenade behind Bathhouse Row Best Light: Morning Lens: 24 - 70mm Access: Easy ✨ Why It Works: Brick paths, fountains and historic buildings show the spa-town experience. Photo Tip: Use railings and paths as leading lines. ✨ The Wild Card: Hot Water Cascade Where: Hot Water Cascade / display springs Best Light: Cool morning Lens: 35 - 85mm Access: Easy ✨ Why It Works: Steam rising from thermal water connects the architecture to the natural resource. Photo Tip: Backlight steam when conditions allow.
33
Indiana Dunes National Park Indiana
The Icon: Lake Michigan Sunset Where: West Beach / Portage Lakefront area Best Light: Sunset Lens: 24 - 70mm Access: Easy ✨ Why It Works: Dunes, grasses and open water make Indiana feel surprisingly coastal. Photo Tip: Use beach grass as foreground and keep the horizon level. The Experience: Dune Ridge Trail Where: West Beach / dune trail Best Light: Morning / late afternoon Lens: 16 - 35mm Access: Moderate hike ✨ Why It Works: A hiker cresting the sand shows the park's topography. Photo Tip: Shoot low to exaggerate the slope and dune grass. ✨ The Wild Card: Great Marsh Birds Where: Great Marsh / birding areas Best Light: Dawn Lens: Telephoto Access: Easy boardwalk / roadside ✨ Why It Works: Wetlands add a wildlife-rich counterpoint to the beaches. Photo Tip: Look for birds within habitat rather than isolated against empty sky.
34
Isle Royale National Park Michigan
The Icon: Rock Harbor Shoreline Where: Scoville Point / Rock Harbor area Best Light: Morning / evening Lens: 24 - 70mm Access: Ferry/boat + easy hike ✨ Why It Works: Rocky Lake Superior shoreline and spruce forest define the island wilderness. Photo Tip: Use wave-washed rock as foreground. The Experience: Greenstone Ridge Where: Greenstone Ridge Trail viewpoints Best Light: Morning / late afternoon Lens: 24 - 70mm Access: Backcountry hike ✨ Why It Works: Long ridgeline views reveal just how remote the island is. Photo Tip: Carry minimal photo weight; every ounce travels with you. ✨ The Wild Card: Moose in Wetland Habitat Where: Rock Harbor / inland wetland areas Best Light: Dawn / dusk Lens: Telephoto Access: Hiking wildlife encounter ✨ Why It Works: Moose are a signature Isle Royale subject. Photo Tip: Maintain distance and never position yourself between a moose and its escape route.
35
Joshua Tree National Park California
The Icon: Joshua Tree Silhouette Where: Keys View / open Joshua tree forest Best Light: Sunset Lens: 24 - 70mm Access: Roadside / short walk ✨ Why It Works: The branching trees become graphic silhouettes against desert color. Photo Tip: Separate the tree from the horizon for a cleaner shape. The Experience: Cholla Cactus Garden Where: Cholla Cactus Garden Best Light: Sunrise Lens: 35 - 85mm Access: Easy ✨ Why It Works: Backlit spines glow in early light. Photo Tip: Stay on the path; cholla segments detach easily. ✨ The Wild Card: Milky Way + Arch Rock Where: Arch Rock / dark-sky areas Best Light: Moonless night Lens: 14 - 24mm Access: Short walk ✨ Why It Works: Granite formations and Joshua trees make excellent night-sky foregrounds. Photo Tip: Scout in daylight and use red light after dark.
36
Katmai National Park and Preserve Alaska
The Icon: Brown Bear at Brooks Falls Where: Brooks Falls platforms Best Light: Salmon season / daylight Lens: 100 - 500mm Access: Boardwalk + platform ✨ Why It Works: A bear fishing beside the waterfall is one of America's iconic wildlife images. Photo Tip: Focus on behavior and keep shutter speed high. The Experience: Bear on Brooks River Where: Brooks River corridor Best Light: Morning / evening Lens: Telephoto Access: Guided/managed wildlife viewing ✨ Why It Works: Bears walking through water create intimate habitat photographs. Photo Tip: Follow all bear-management instructions without exception. ✨ The Wild Card: Valley of Ten Thousand Smokes Where: Valley of Ten Thousand Smokes Best Light: Midday / dramatic weather Lens: 24 - 70mm Access: Bus + hike ✨ Why It Works: Ash-filled valleys and volcanic terrain show Katmai beyond bears. Photo Tip: Wide compositions work best when weather adds depth.
37
Kenai Fjords National Park Alaska
The Icon: Aialik Glacier from the Water Where: Boat tour in Aialik Bay Best Light: Overcast / bright morning Lens: 70 - 200mm Access: Boat ✨ Why It Works: Blue ice, dark water and mountains capture the fjord experience. Photo Tip: Leave space around the glacier instead of filling the frame. The Experience: Exit Glacier Where: Exit Glacier area Best Light: Morning Lens: 24 - 70mm Access: Easy - moderate hike ✨ Why It Works: Trailside views show glacier retreat and surrounding valley. Photo Tip: Use people or trail elements for scale. ✨ The Wild Card: Whale + Fjord Mountains Where: Boat tour route Best Light: Whenever wildlife appears Lens: 100 - 500mm Access: Boat ✨ Why It Works: Marine wildlife against snowy mountains creates a uniquely Alaskan frame. Photo Tip: Use fast shutter speed and brace against boat motion.
Keep this guide open while comparing routes, seasons, and the small park markers that help each stop stay distinct.
38
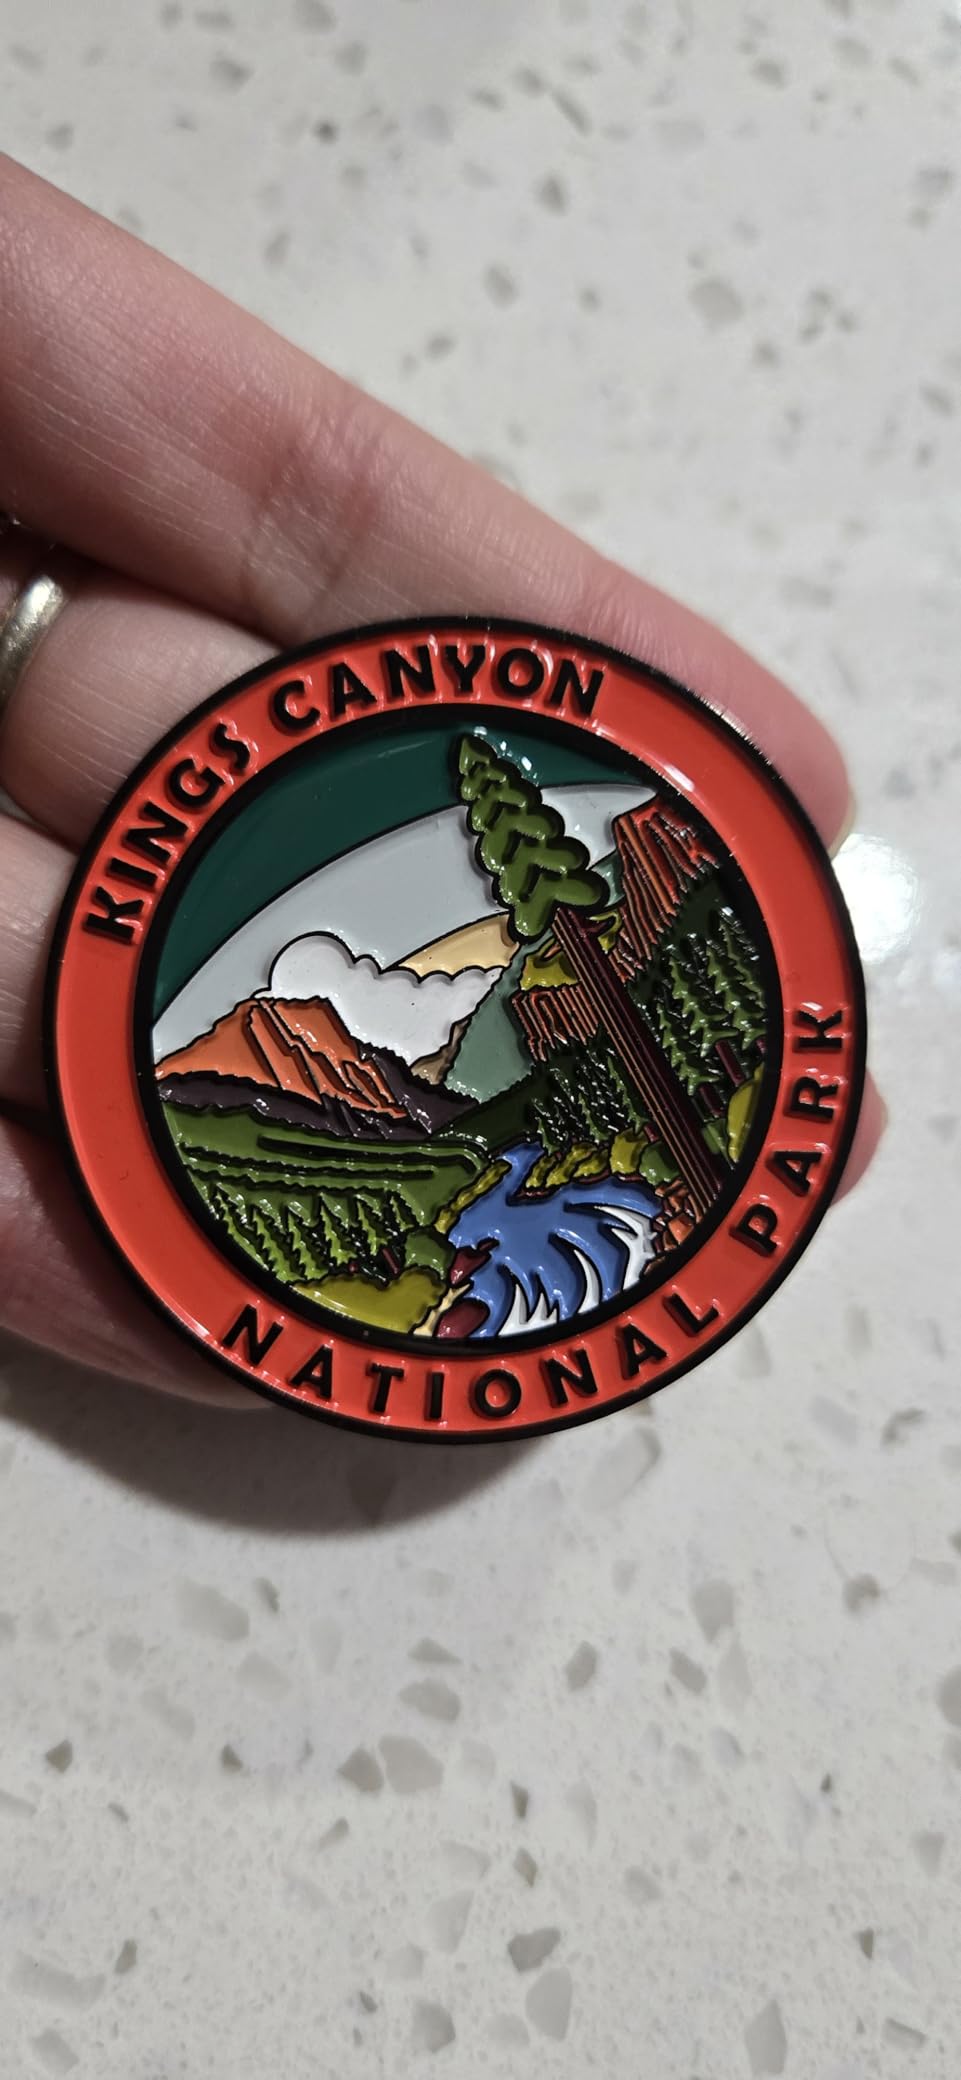
Kings Canyon National Park California
The Icon: Kings Canyon from Cedar Grove Where: Cedar Grove / Kings Canyon Scenic Byway Best Light: Late afternoon Lens: 24 - 70mm Access: Roadside + short walk ✨ Why It Works: Granite walls and river scenery give the park its Sierra grandeur. Photo Tip: Use the river or road as a leading line. The Experience: General Grant Tree Where: Grant Grove Best Light: Morning Lens: 16 - 35mm Access: Easy walk ✨ Why It Works: A person beside the giant sequoia instantly communicates size. Photo Tip: Avoid tilting too aggressively; include forest floor for scale. ✨ The Wild Card: Zumwalt Meadow Where: Zumwalt Meadow area Best Light: Morning / late afternoon Lens: 24 - 70mm Access: Easy - moderate walk ✨ Why It Works: Meadow, river and granite canyon create a calmer Kings Canyon image. Photo Tip: Look for reflections and meadow foreground layers.
39
Kobuk Valley National Park Alaska
The Icon: Great Kobuk Sand Dunes from the Air Where: Bush-plane approach Best Light: Morning / evening Lens: 24 - 70mm Access: Flight access ✨ Why It Works: Huge dunes surrounded by Arctic wilderness are visually startling. Photo Tip: Use shadows to reveal dune relief. The Experience: Walking the Dune Ridges Where: Great Kobuk Sand Dunes Best Light: Late afternoon Lens: 24 - 70mm Access: Backcountry hike ✨ Why It Works: A tiny person on a ridge shows how enormous the dunes really are. Photo Tip: Carry wind protection for camera gear. ✨ The Wild Card: Caribou Migration Where: Kobuk River / dune region when migration aligns Best Light: Seasonal Lens: Telephoto Access: Expedition ✨ Why It Works: Caribou crossing open tundra or river is a rare, extraordinary story image. Photo Tip: Treat it as an unpredictable bonus, never a guaranteed shot.
40
Lake Clark National Park and Preserve Alaska
The Icon: Brown Bear on the Coast Where: Chinitna Bay / Silver Salmon Creek Best Light: Morning / evening Lens: 100 - 500mm Access: Bush plane + guided viewing ✨ Why It Works: Bears feeding against tidal flats are Lake Clark's signature image. Photo Tip: Stay with established viewing protocols and photograph natural behavior. The Experience: Turquoise Lake Clark Where: Lake Clark shoreline / lodge area Best Light: Morning Lens: 24 - 70mm Access: Flight + local access ✨ Why It Works: Blue lake, forest and mountains show the park's quieter side. Photo Tip: Use a dock, canoe or shoreline as foreground. ✨ The Wild Card: Volcano Above the Coast Where: Cook Inlet side with Iliamna/Redoubt views Best Light: Clear morning Lens: 70 - 200mm Access: Remote access ✨ Why It Works: Volcanoes rising beyond bear country give the landscape enormous depth. Photo Tip: Wait for clear weather; clouds often hide the peaks.
41
Lassen Volcanic National Park California
The Icon: Lassen Peak from Manzanita Lake Where: Manzanita Lake Best Light: Morning Lens: 24 - 70mm Access: Easy ✨ Why It Works: Still water can mirror the volcano and forest. Photo Tip: Arrive early before wind breaks the reflection. The Experience: Bumpass Hell Where: Bumpass Hell boardwalk area Best Light: Morning / afternoon Lens: 24 - 70mm Access: Moderate hike ✨ Why It Works: Steam vents and colorful hydrothermal terrain show the park's volcanic engine. Photo Tip: Keep people on boardwalks and use steam as a framing element. ✨ The Wild Card: Milky Way + Lassen Peak Where: Manzanita Lake / dark viewpoints Best Light: Moonless night Lens: 14 - 24mm Access: Easy ✨ Why It Works: Dark skies above a volcanic silhouette create a strong night-scape. Photo Tip: Scout shoreline compositions in daylight.
42
Mammoth Cave National Park Kentucky
The Icon: Historic Entrance Where: Historic Entrance Best Light: Morning Lens: 24 - 70mm Access: Easy ✨ Why It Works: The dark portal framed by green forest creates immediate mystery. Photo Tip: Expose for the entrance while preserving surrounding foliage. The Experience: Cave Passage Where: On an appropriate cave tour Best Light: Tour lighting Lens: Wide-angle fast lens Access: Guided cave tour ✨ Why It Works: Human figures inside broad passages reveal the cave's immense scale. Photo Tip: Respect tour rules and avoid obstructing other visitors. ✨ The Wild Card: Green River Landscape Where: Green River / ferry area Best Light: Morning mist / sunset Lens: 24 - 70mm Access: Roadside / easy walk ✨ Why It Works: River and forest remind viewers the park has a rich surface world too. Photo Tip: Use fog or reflections to separate it from ordinary woodland scenes.
43
Mesa Verde National Park Colorado
The Icon: Cliff Palace Where: Cliff Palace overlook / tour area Best Light: Late afternoon Lens: 24 - 70mm Access: Overlook or ranger tour ✨ Why It Works: The huge alcove dwelling is Mesa Verde's defining photograph. Photo Tip: Shoot obliquely to reveal depth within the alcove. The Experience: Mesa Top Sites Where: Mesa Top Loop Best Light: Morning / afternoon Lens: 24 - 70mm Access: Roadside + easy walks ✨ Why It Works: Surface sites connect the cliff dwellings to centuries of Pueblo life. Photo Tip: Include surrounding mesa landscape for context. ✨ The Wild Card: Square Tower House View Where: Square Tower House overlook Best Light: Late afternoon Lens: 70 - 200mm Access: Easy overlook ✨ Why It Works: The tall masonry tower creates a strong vertical focal point. Photo Tip: A longer lens isolates architecture within the cliff.
Keep this guide open while comparing routes, seasons, and the small park markers that help each stop stay distinct.
44
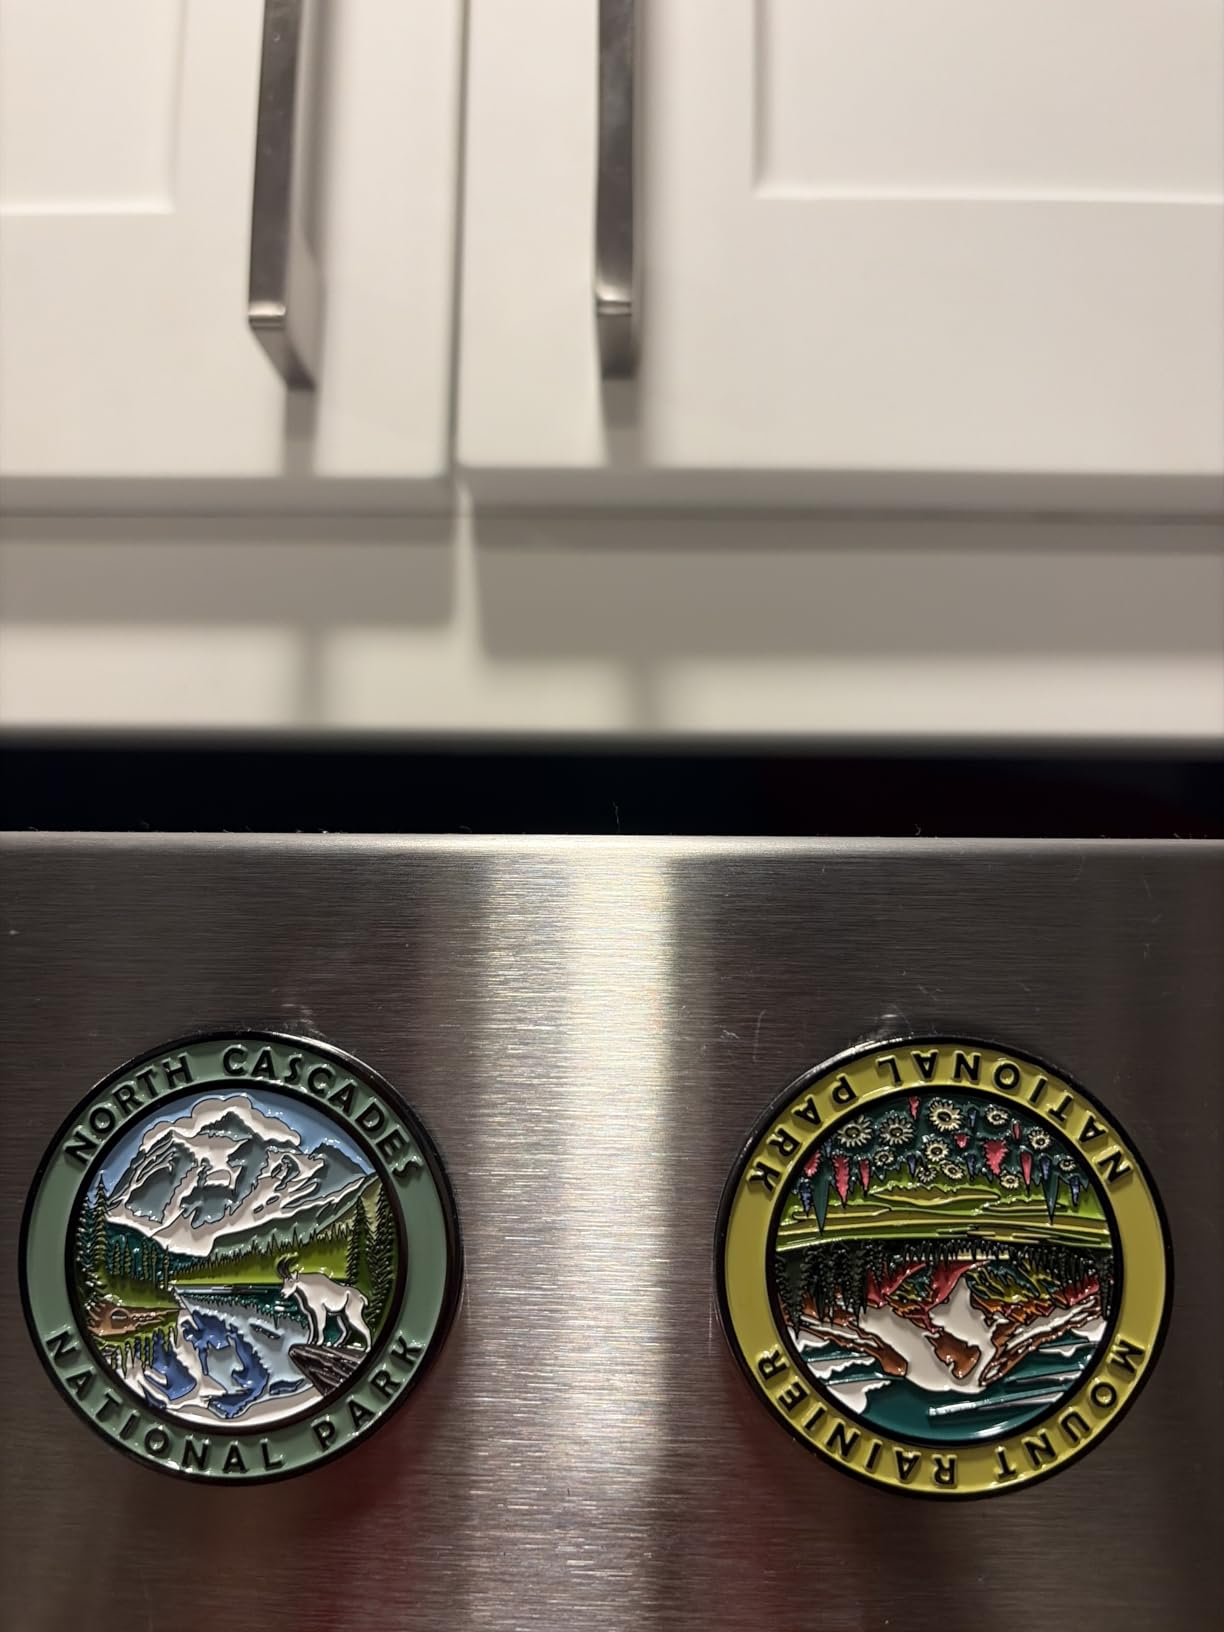
Mount Rainier National Park Washington
The Icon: Reflection Lakes Where: Reflection Lakes Best Light: Early morning Lens: 24 - 70mm Access: Roadside / short walk ✨ Why It Works: Rainier mirrored in still water is the classic park image. Photo Tip: Wind is the enemy; arrive early for the calmest water. The Experience: Skyline Trail Wildflowers Where: Paradise / Skyline Trail Best Light: Morning Lens: 16 - 35mm Access: Moderate hike ✨ Why It Works: Wildflower meadows beneath the volcano embody summer Rainier. Photo Tip: Get low enough to include flowers without trampling vegetation. ✨ The Wild Card: Myrtle Falls + Rainier Where: Myrtle Falls area Best Light: Morning / late afternoon Lens: 24 - 70mm Access: Short hike ✨ Why It Works: Waterfall, meadow and volcano stack into a complete landscape story. Photo Tip: Use a moderate shutter speed to keep texture in the water.
45
New River Gorge National Park and Preserve West Virginia
The Icon: New River Gorge Bridge Where: Long Point Best Light: Late afternoon Lens: 24 - 70mm Access: Moderate hike ✨ Why It Works: The steel arch bridge spanning a forested gorge is the park's emblem. Photo Tip: Fall color adds an extra layer, but the composition works year-round. The Experience: Endless Wall View Where: Endless Wall Trail Best Light: Morning / late afternoon Lens: 24 - 70mm Access: Moderate hike ✨ Why It Works: Cliff-edge viewpoints make the river's depth and curves visible. Photo Tip: Use foreground rock safely, staying well back from edges. ✨ The Wild Card: Sandstone Falls Where: Sandstone Falls boardwalks Best Light: Morning / overcast Lens: 24 - 70mm Access: Easy boardwalk ✨ Why It Works: Broad cascades show a softer, water-focused side of the park. Photo Tip: Overcast conditions help manage bright water highlights.
46
North Cascades National Park Washington
The Icon: Diablo Lake Turquoise View Where: Diablo Lake Overlook in the broader North Cascades complex Best Light: Midday / clear weather Lens: 24 - 70mm Access: Roadside ✨ Why It Works: Glacial flour gives the lake its electric turquoise color beneath rugged peaks. Photo Tip: Midday can actually help the water color here. The Experience: Cascade Pass Where: Cascade Pass Trail Best Light: Morning Lens: 16 - 35mm Access: Strenuous hike ✨ Why It Works: A high pass surrounded by glaciers is the quintessential North Cascades hike. Photo Tip: Start early for softer light and more stable mountain weather. ✨ The Wild Card: Sahale Arm Where: Above Cascade Pass toward Sahale Arm Best Light: Golden hour Lens: 24 - 70mm Access: Very strenuous hike ✨ Why It Works: Wildflowers, rock and glaciers create deep alpine layers. Photo Tip: Carry only essential photo gear; the elevation gain is substantial.
47
Olympic National Park Washington
The Icon: Ruby Beach Sea Stacks Where: Ruby Beach Best Light: Sunset Lens: 16 - 35mm Access: Short walk ✨ Why It Works: Dark sea stacks, driftwood and surf create a dramatic Pacific image. Photo Tip: Use a sturdy tripod and watch sneaker waves. The Experience: Hoh Rain Forest Where: Hall of Mosses / Hoh trails Best Light: Overcast / rainy Lens: 24 - 70mm Access: Easy - moderate ✨ Why It Works: Moss-draped trees glow in soft wet light. Photo Tip: Overcast is an advantage; avoid trying to 'fix' the forest into sunny colors. ✨ The Wild Card: Hurricane Ridge Where: Hurricane Ridge area Best Light: Sunrise / late afternoon Lens: 24 - 70mm Access: Road + short walk ✨ Why It Works: Alpine ridges reveal Olympic's third world beyond coast and rainforest. Photo Tip: Use foreground wildflowers or deer only from a respectful distance.
48
Petrified Forest National Park Arizona
The Icon: Blue Mesa Where: Blue Mesa overlooks / trail Best Light: Morning / late afternoon Lens: 24 - 70mm Access: Roadside + short walk ✨ Why It Works: Blue, purple and gray badlands are unlike the park's desert surroundings. Photo Tip: Side light makes subtle color bands more visible. The Experience: Crystal Forest Petrified Logs Where: Crystal Forest Trail Best Light: Morning Lens: 35 - 85mm Access: Easy walk ✨ Why It Works: Polished-looking fossil wood gives the park its namesake subject. Photo Tip: Photograph textures and cross-sections as well as whole logs. ✨ The Wild Card: Painted Desert Layers Where: Painted Desert overlooks Best Light: Sunset Lens: 70 - 200mm Access: Roadside ✨ Why It Works: Compressed bands of color feel almost abstract. Photo Tip: Long lenses simplify the landscape into stacked tones.
49
Pinnacles National Park California
The Icon: High Peaks Spires Where: High Peaks Trail viewpoints Best Light: Morning / late afternoon Lens: 24 - 70mm Access: Strenuous hike ✨ Why It Works: Jagged volcanic formations define the park's skyline. Photo Tip: Use hikers on switchbacks to show scale. The Experience: Bear Gulch Reservoir Where: Bear Gulch Reservoir Best Light: Morning Lens: 16 - 35mm Access: Moderate hike ✨ Why It Works: Water reflecting rock formations adds a serene contrast to the spires. Photo Tip: Look for still conditions before crowds arrive. ✨ The Wild Card: California Condor in Flight Where: High Peaks / ridge viewpoints Best Light: Late morning Lens: 100 - 500mm Access: Hike ✨ Why It Works: A condor soaring over pinnacles is the park's ultimate wildlife frame. Photo Tip: Track birds with continuous autofocus and respect nesting closures.
Keep this guide open while comparing routes, seasons, and the small park markers that help each stop stay distinct.
50
Redwood National and State Parks California
The Icon: Towering Redwood Grove Where: Tall Trees Grove / Prairie Creek area Best Light: Foggy morning Lens: 16 - 35mm Access: Moderate walk ✨ Why It Works: Vertical trunks disappearing into mist communicate impossible height. Photo Tip: Include a small person for scale and keep vertical lines controlled. The Experience: Fern Canyon Where: Fern Canyon Best Light: Overcast / morning Lens: 16 - 35mm Access: Easy - moderate creek walk ✨ Why It Works: Fern-covered walls create an immersive green corridor. Photo Tip: Protect gear from water and use a person as a scale cue. ✨ The Wild Card: Roosevelt Elk Where: Prairie Creek / Elk Meadow areas Best Light: Dawn / dusk Lens: Telephoto Access: Roadside wildlife viewing ✨ Why It Works: Elk in foggy meadow pair wildlife with redwood habitat. Photo Tip: Keep substantial distance, especially during rut and calving seasons.
51
Rocky Mountain National Park Colorado
The Icon: Dream Lake + Hallett Peak Where: Dream Lake Best Light: Sunrise Lens: 24 - 70mm Access: Moderate hike ✨ Why It Works: Alpine lake, forest and granite peaks form a perfect Rocky Mountain composition. Photo Tip: Arrive early for calm water and fewer people. The Experience: Trail Ridge Road Tundra Where: Trail Ridge Road overlooks Best Light: Morning / late afternoon Lens: 24 - 70mm Access: Roadside + short walks ✨ Why It Works: Open tundra and vast elevation show the park above treeline. Photo Tip: Use winding road or trail as a leading line. ✨ The Wild Card: Elk in Moraine Park Where: Moraine Park Best Light: Dawn / dusk Lens: Telephoto Access: Roadside ✨ Why It Works: Elk against meadow and mountains create a complete habitat portrait. Photo Tip: Give animals space and avoid crowding roadside pullouts.
52
Saguaro National Park Arizona
The Icon: Saguaro Sunset Silhouette Where: Tucson Mountain District / Gates Pass side viewpoints Best Light: Sunset Lens: 24 - 70mm Access: Roadside / short walk ✨ Why It Works: Giant cactus silhouettes against orange sky scream Sonoran Desert. Photo Tip: Separate individual cactus shapes rather than stacking them together. The Experience: Cactus Forest Drive Where: Rincon Mountain District Best Light: Morning / late afternoon Lens: 24 - 70mm Access: Scenic drive + short walks ✨ Why It Works: A road threading through dense saguaros captures the drive experience. Photo Tip: Use curves in the road as a visual guide. ✨ The Wild Card: Moonrise Behind Saguaros Where: Open desert viewpoints Best Light: Moonrise / blue hour Lens: 70 - 200mm Access: Roadside / short walk ✨ Why It Works: A long lens can make the moon loom behind cactus arms. Photo Tip: Plan moon position in advance for alignment.
53
Sequoia National Park California
The Icon: General Sherman + Human Scale Where: General Sherman Tree Best Light: Morning Lens: 16 - 35mm Access: Easy - moderate walk ✨ Why It Works: A person beside the trunk is the clearest way to show the world's giant. Photo Tip: Step back enough to include trunk, people and surrounding forest. The Experience: Moro Rock View Where: Moro Rock Best Light: Sunrise / late afternoon Lens: 24 - 70mm Access: Steep stair climb ✨ Why It Works: The Sierra opens dramatically from the granite dome. Photo Tip: Use the stone stairway or railing carefully as a leading line. ✨ The Wild Card: Giant Forest in Fog or Snow Where: Giant Forest Best Light: Soft weather Lens: 24 - 70mm Access: Easy - moderate walks ✨ Why It Works: Atmosphere simplifies the forest and makes giant trunks feel mysterious. Photo Tip: Expose for bark texture and let fog hide visual clutter.
54
Shenandoah National Park Virginia
The Icon: Blue Ridge Layers Where: Stony Man / Skyline Drive overlooks Best Light: Sunrise Lens: 70 - 200mm Access: Roadside / short hike ✨ Why It Works: Layered ridges fading into haze are Shenandoah's signature. Photo Tip: Use a longer lens to emphasize atmospheric perspective. The Experience: Skyline Drive in Fall Where: Skyline Drive overlooks / curves Best Light: Morning / late afternoon Lens: 24 - 70mm Access: Roadside ✨ Why It Works: A ribbon of road through autumn forest captures the park's road-trip appeal. Photo Tip: Find a safe overlook where the road curves naturally through the frame. ✨ The Wild Card: Dark Hollow Falls Where: Dark Hollow Falls Trail Best Light: Overcast Lens: 24 - 70mm Access: Moderate downhill/uphill ✨ Why It Works: Waterfall and hardwood forest give a more intimate park view. Photo Tip: Remember the climb back; carry only the gear you need.
55
Theodore Roosevelt National Park North Dakota
The Icon: Painted Canyon Where: Painted Canyon Overlook Best Light: Sunrise / late afternoon Lens: 24 - 70mm Access: Roadside ✨ Why It Works: Striped badlands rolling into prairie are the park's classic scene. Photo Tip: Side light reveals the erosion patterns. The Experience: Bison on Scenic Loop Where: South Unit scenic roads Best Light: Dawn / dusk Lens: Telephoto Access: Roadside ✨ Why It Works: Bison moving through open badlands make the landscape feel alive. Photo Tip: Stay in your vehicle when appropriate and never approach. ✨ The Wild Card: Prairie Dog Town Where: Prairie dog colonies Best Light: Morning Lens: 100 - 500mm Access: Roadside / short walk ✨ Why It Works: Expressive prairie dogs add humor and behavior to the photo set. Photo Tip: Wait for interaction instead of photographing isolated animals.
Keep this guide open while comparing routes, seasons, and the small park markers that help each stop stay distinct.
56
Virgin Islands National Park U.S. Virgin Islands
The Icon: Trunk Bay Overlook Where: North Shore Road overlook Best Light: Morning Lens: 24 - 70mm Access: Roadside ✨ Why It Works: Turquoise water, white sand and green hills create the Caribbean postcard. Photo Tip: Use a polarizer carefully to control glare on the bay. The Experience: Underwater Snorkel Trail Where: Trunk Bay / other reef areas Best Light: Late morning Lens: Underwater wide-angle Access: Snorkel ✨ Why It Works: Fish and coral show that much of the park's beauty is below water. Photo Tip: Shoot close and horizontally for clearer underwater color. ✨ The Wild Card: Sea Turtle at Maho Bay Where: Maho Bay Best Light: Morning Lens: Underwater wide-angle / action camera Access: Easy snorkel ✨ Why It Works: A turtle over seagrass gives an iconic wildlife experience. Photo Tip: Maintain distance and never chase or touch turtles.
57
Voyageurs National Park Minnesota
The Icon: Lake + Island Sunrise Where: Rainy Lake / Kabetogama viewpoints Best Light: Sunrise Lens: 24 - 70mm Access: Boat or shoreline ✨ Why It Works: Pine islands reflected in calm water define this water-based park. Photo Tip: Early morning usually gives the cleanest reflections. The Experience: Houseboat on the Water Where: Voyageurs lake system Best Light: Golden hour Lens: 24 - 70mm Access: Boat ✨ Why It Works: A boat moving between islands tells the park's roadless travel story. Photo Tip: Photograph from shore or another boat with plenty of environment visible. ✨ The Wild Card: Northern Lights Where: Dark shoreline / campsite Best Light: Night Lens: 14 - 24mm Access: Boat/camp access ✨ Why It Works: Aurora over still water can become a once-in-a-lifetime frame. Photo Tip: Use a tripod and monitor aurora forecasts, but never promise a display.
58
White Sands National Park New Mexico
The Icon: White Dunes at Sunset Where: Dunes Drive / open dune field Best Light: Sunset Lens: 24 - 70mm Access: Easy - moderate sand walk ✨ Why It Works: Warm light turns white gypsum into pastel gold and blue shadows. Photo Tip: Expose carefully so the brightest sand keeps texture. The Experience: Footprints Across a Ridge Where: Open dune field Best Light: Late afternoon Lens: 35 - 85mm Access: Moderate sand walk ✨ Why It Works: A person or footprints create scale and movement through the minimalist landscape. Photo Tip: Choose a clean ridge and avoid cluttered footprints. ✨ The Wild Card: Dune Texture / Moonlight Where: Quiet dune area Best Light: Blue hour / moonrise Lens: 70 - 200mm Access: Short walk ✨ Why It Works: Long shadows and curves turn the dunes into abstract graphics. Photo Tip: A longer lens simplifies patterns beautifully.
59
Wind Cave National Park South Dakota
The Icon: Boxwork Formations Where: Wind Cave tour route Best Light: Tour lighting Lens: Wide-angle fast lens Access: Guided cave tour ✨ Why It Works: Rare honeycomb-like boxwork is the cave's defining geological feature. Photo Tip: Use available light and follow all tour photography rules. The Experience: Bison on the Prairie Where: Prairie roads / wildlife areas Best Light: Dawn / dusk Lens: Telephoto Access: Roadside ✨ Why It Works: Bison above an underground cave system reveal the park's two worlds. Photo Tip: Photograph habitat, not just tight animal portraits. ✨ The Wild Card: Rankin Ridge Sunset Where: Rankin Ridge area Best Light: Sunset Lens: 24 - 70mm Access: Moderate hike ✨ Why It Works: Open Black Hills views provide a beautiful surface finale. Photo Tip: Use grasses and ridge lines to lead toward the sky.
60
Wrangell - St. Elias National Park and Preserve Alaska
The Icon: Kennecott Mine + Mountains Where: Kennecott Best Light: Morning / evening Lens: 24 - 70mm Access: Road/shuttle + walk ✨ Why It Works: Historic red mill buildings beneath enormous peaks are uniquely Wrangell - St. Elias. Photo Tip: Use architecture as foreground against the mountain wall. The Experience: Root Glacier Hike Where: Root Glacier Best Light: Morning Lens: 16 - 35mm Access: Moderate hike + glacier travel ✨ Why It Works: Hikers on blue ice communicate adventure and immense scale. Photo Tip: Use proper glacier guidance/gear and keep people small in the frame. ✨ The Wild Card: Aerial Mountain Range Where: Flightseeing over the park Best Light: Clear morning Lens: 24 - 70mm Access: Bush plane ✨ Why It Works: The park's true vastness only becomes obvious from the air. Photo Tip: Use fast shutter speed and compose through clean windows.
61
Yellowstone National Park Wyoming, Montana & Idaho
The Icon: Grand Prismatic from Above Where: Grand Prismatic Overlook Best Light: Late morning / afternoon Lens: 24 - 70mm or phone 2× Access: Short hike ✨ Why It Works: The elevated view reveals the spring's full rainbow shape. Photo Tip: Very early morning can be steamier; later light often reveals more color. The Experience: Bison in Lamar Valley Where: Lamar Valley Best Light: Sunrise Lens: 100 - 500mm Access: Roadside pullouts ✨ Why It Works: Wildlife inside a huge valley gives a true sense of Yellowstone. Photo Tip: Photograph animals in habitat and maintain required distance. ✨ The Wild Card: Lower Falls from Artist Point Where: Artist Point Best Light: Morning Lens: 24 - 70mm Access: Easy ✨ Why It Works: Waterfall and yellow canyon walls create one of the park's strongest landscapes. Photo Tip: Include both canyon walls rather than zooming too tightly onto the falls.
Keep this guide open while comparing routes, seasons, and the small park markers that help each stop stay distinct.
62
Yosemite National Park California
The Icon: Tunnel View Where: Tunnel View Best Light: Late afternoon / sunset Lens: 24 - 70mm Access: Roadside ✨ Why It Works: El Capitan, Half Dome and Bridalveil Fall combine in one famous frame. Photo Tip: Wait for changing light instead of taking one photo and leaving. The Experience: Yosemite Falls from the Valley Where: Cook's Meadow / valley floor Best Light: Morning Lens: 24 - 70mm Access: Easy ✨ Why It Works: Meadow foreground communicates the extraordinary height of the falls. Photo Tip: Add a person or tree for scale. ✨ The Wild Card: Half Dome at Sunset Where: Glacier Point area Best Light: Sunset Lens: 50 - 100mm Access: Easy - moderate depending on access ✨ Why It Works: Warm evening light can transform Half Dome. Photo Tip: Stay for afterglow after direct sun disappears.
63
Zion National Park Utah
The Icon: The Narrows Where: Virgin River inside The Narrows Best Light: Mid-morning Lens: 16 - 35mm Access: River hike ✨ Why It Works: A person beneath immense canyon walls instantly communicates scale. Photo Tip: Use the river as a leading line and check flash-flood conditions. The Experience: Canyon Overlook Where: Canyon Overlook Trail Best Light: Sunrise Lens: 16 - 35mm / phone Access: Short hike ✨ Why It Works: One of Zion's highest scenery-to-effort views. Photo Tip: Place a person safely in the scene to establish canyon scale. ✨ The Wild Card: Watchman + Virgin River Where: Pa'rus Trail / Canyon Junction area Best Light: Golden hour Lens: 35 - 85mm Access: Easy ✨ Why It Works: Red rock, river and cottonwoods create layered Zion color. Photo Tip: Fall foliage can completely change the composition.